Laminate flooring can add both beauty and practicality to any home. It offers an attractive surface that is often simpler to install than traditional hardwood. The key is selecting the right pattern and following proper steps to ensure solid results. This article covers crucial considerations—such as subfloor preparation, selecting materials, and installation techniques—to help create a stunning laminate floor design in a structured pattern.
Selecting a high-quality laminate is vital for a long-lasting and beautiful floor. It is useful to choose laminate boards with a durable wear layer that can withstand daily foot traffic. Many homeowners prefer water-resistant laminate in moisture-prone areas, ensuring that occasional spills do not cause permanent damage.
Another important factor is the laminate’s aesthetic appeal. Boards come in styles resembling hardwood, stone, or unique decorative prints. For patterned installations, it helps to choose boards that blend well with each other to achieve a visually consistent layout. A reputable brand often provides reliable products that meet strict industry standards.
Gathering Tools And Materials
A well-organized collection of tools and materials saves time and effort. In most cases, basic equipment like a tape measure, rubber mallet, utility knife, and level is necessary. Specialty tools such as a floor pull bar and laminate installation kit simplify the process around edges and corners.
Additional supplies include underlayment and spacers. Underlayment helps ensure a smooth surface, sound absorption, and minor moisture protection. Many manufacturers recommend using their compatible underlayment to extend warranty coverage. Spacers, typically small plastic wedges, maintain consistent expansion gaps along walls, preventing buckling or warping.
Preparing The Subfloor
A stable subfloor is the foundation for a beautiful patterned laminate floor. Common types include concrete slabs, plywood, or existing floorboards. The subfloor must be thoroughly cleaned, dried, and leveled before installation can begin. Minor imperfections can usually be remedied with a self-leveling compound or through spot sanding.
If the subfloor is a concrete slab, it may require an additional moisture barrier to protect the laminate from ground dampness. Meanwhile, an older wooden subfloor may need new screws to reduce squeaks or movement. By ensuring the subfloor is flat and rigid, the final laminate layer will look smoother.
Planning The Layout And Pattern
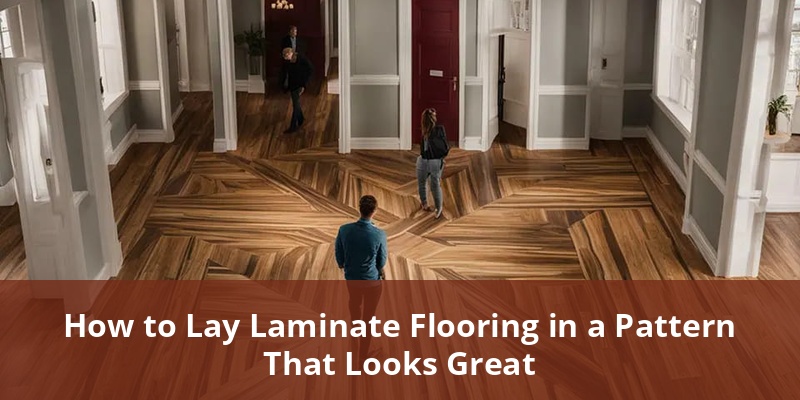
Laying laminate in a pattern requires a detailed layout plan. One of the most popular approaches is the staggered plank design, in which each row’s joints are offset. Another creative option is a herringbone arrangement, involving angled placements that create a striking interlocking effect. Irregular or random-stagger designs can also make a stylish statement.
Before moving board to floor, measure each room and sketch the exact placement of rows. Identify which walls or focal points align best with visible joints and patterns. This planning minimizes wasted material and ensures a balanced appearance. It also helps to open multiple laminate bundles ahead of time to blend color variations evenly.
Installing The First Rows
The initial rows lay the foundation for the entire laminate design. Start along the longest wall, positioning boards so that the groove side faces outward for easier locking. Use spacers to create an expansion gap of approximately ¼ inch around all fixed objects such as walls and door frames.
Always follow the manufacturer’s instructions for connecting boards. Normally, the tongue on one board fits into the groove of another at an angle, then locks in place by pressing down. Periodically use a level to confirm each row is aligned. Adjust or re-check spacers if any shifting occurs along the way.
Continuing The Pattern
As each subsequent row is added, keep the design consistent with the chosen pattern. For staggered installations, ensure the end joints are offset by at least 8 to 12 inches from those in the previous row. This prevents weak points and fosters visual appeal.
When creating more intricate patterns like a herringbone, carefully measure and cut each board. Labeling cut pieces can help prevent confusion as installation progresses, especially in larger areas. Consistent attention to detail during this stage pays off by producing a seamless final appearance.
Dealing With Doorways And Obstacles
Door jambs, closets, and vents may require extra planning. When boards meet door trims, it is usually simpler to trim the casing slightly so the laminate slides underneath. This yields a neat finish at the doorway’s threshold.
For floor vents or pipes, precisely measure and cut openings in the laminate. Use a jigsaw or hole saw for customized shapes. Remember to leave a small gap around vents and fixtures for proper expansion. This gap can later be concealed with trim or vent covers.
Securing Edges And Transitions
Edges adjacent to walls and corners require spacing for expansion. Once the final row is in place, remove spacers and inspect the perimeter. Decorative floor baseboards can hide these gaps while completing the room’s look. In some instances, quarter round molding installed over baseboards may offer additional coverage.
When transitioning from one surface type to another, such as laminate to tile or carpet, a transition strip or threshold molding is recommended. Many laminate products provide matching transition pieces. Ensuring smooth transitions enhances both safety and aesthetics, preventing tripping hazards and finishing the overall design.
Using A Reference Table For Patterns
A simple table can help understand popular laminate patterns. Below is a brief comparison of commonly used designs:
| Pattern Style | Main Feature | Difficulty Level |
|---|---|---|
| Staggered Planks | Offset Joint Rows | Easy |
| Herringbone | Angled Chevron Shapes | Moderate |
| Random Layout | Mixed Lengths And Alignment | Easy |
| Diagonal Placement | 45-Degree Board Orientation | Moderate |
Referencing a quick guide like this can simplify decision-making when planning new laminate flooring. It summarizes the essence of each pattern, helping balance visual interest with project complexity.
Finishing Touches And Maintenance
Once every plank is installed, give the room a final inspection. Check for loose boards, empty gaps, or any irregularities. Then, attach baseboards or moldings, ensuring they do not excessively pinch the laminate at the edges. A proper topcoat of protective sealant is rarely needed with quality laminate, but always follow the precise product guidelines.
Maintaining a patterned laminate floor is straightforward. Regular sweeping or vacuuming removes dirt and debris, while a damp microfiber mop handles deeper cleaning. Avoid abrasive materials that can scratch the laminate’s surface. With diligent care, the vibrant look of patterned laminate flooring endures for many years.
Tips For Long-Term Durability
Prolonging the lifespan of a new floor involves simple habits. Place doormats at entryways to reduce tracked-in dirt and moisture. Use protective pads under furniture legs and always lift heavy items instead of dragging them. Periodic checks around high-traffic areas help detect early signs of wear or separation along joints.
It is also wise to maintain a stable indoor humidity level. Laminate can expand or contract with significant temperature and moisture shifts. Sealing windows and using dehumidifiers in damp climates can mitigate any extreme dimensional changes. These small preventive measures keep the floor looking beautiful and structurally sound.
Enhancing Design With Coordinated Décor
Pairing a striking laminate pattern with coordinated décor takes a room to the next level. Focus on choosing furniture, rugs, and color schemes that complement the floor’s tones. Neutral-toned laminates blend effortlessly with a vast range of interior design styles, from modern minimalism to rustic farmhouse aesthetics.
When selecting accent pieces, remember that the floor pattern is already a focal point. Simple accessories and balanced lighting can highlight the design without overwhelming the space. The goal is to maintain visual harmony, allowing the newly installed laminate floor to command attention for all the right reasons.